
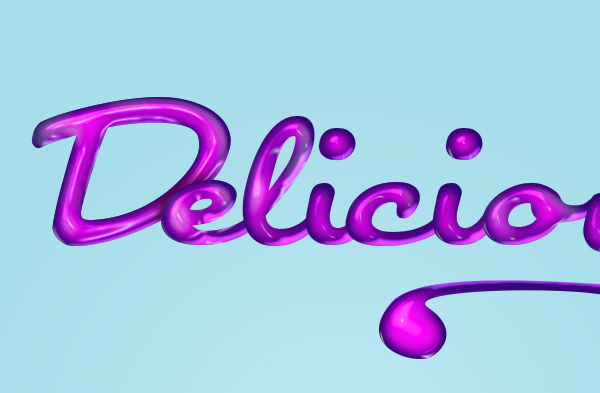
Today I will teach you how to create an amazing candy-like text effect in Photoshop. This simple tutorial is perfect for beginners. You will learn how to apply layer styles to achieve this effect in under 40 steps.
Tutorial Resources:
- Font – Japan
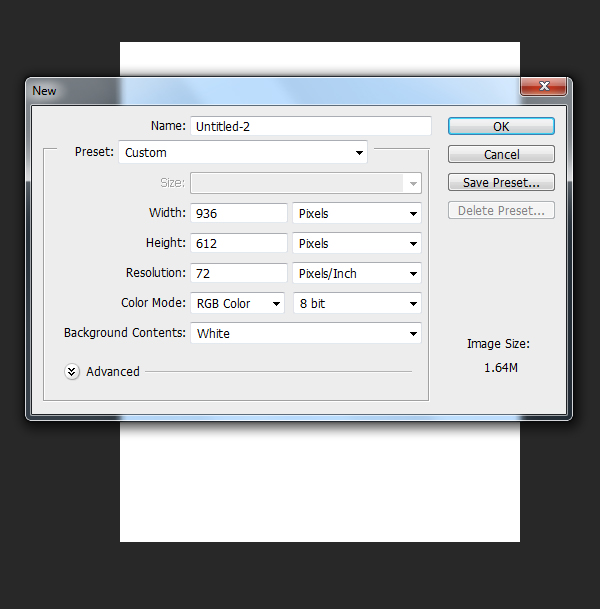
Step 1
Open up Photoshop and create a new document. File>New. The size of my document is 936px x 612px with a resolution of 72.
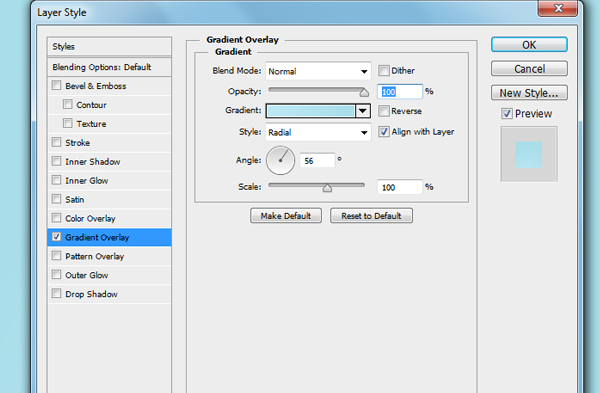
Step 2
On your background layer, add a gradient overlay from the layer styles menu (by double clicking this layer).
Step 3
For now we are going to leave the background alone. Now we will start with the text. For this tutorial I’m using the word “Delicious”. Starting with the letter “D”, the size of my letter is 220pt and color #952480

Step 4
Continue with the rest of your letters but make sure you overlap them in the same color.

Step 5
Create a new layer and use your pen tool to create a swirl at the end of the “s”. At this point it doesn’t matter what color it is. Once you make the path, right click “make selection” and fill it with any color. Next, rasterize the letter “s” and merge the swirl layer with the “s”

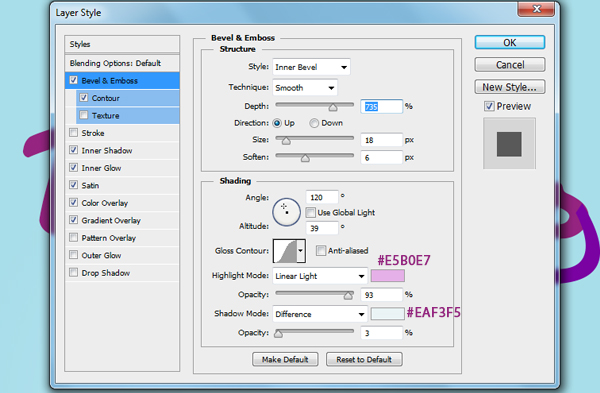
Step 6
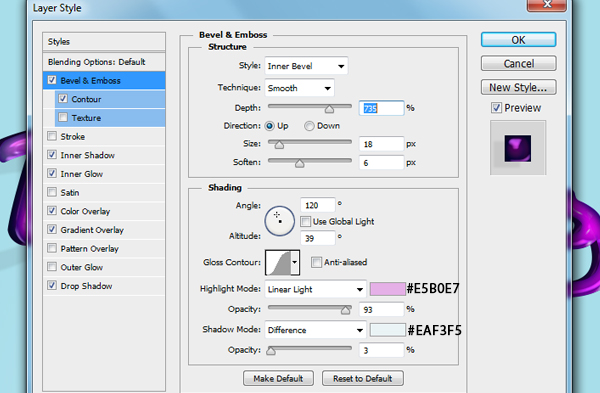
Now we will add layer styles to each of the letters. Starting with the letter “D”, double click this layer so that the layer style box pops up. We will first start off with Bevel and Emboss.
Step 7
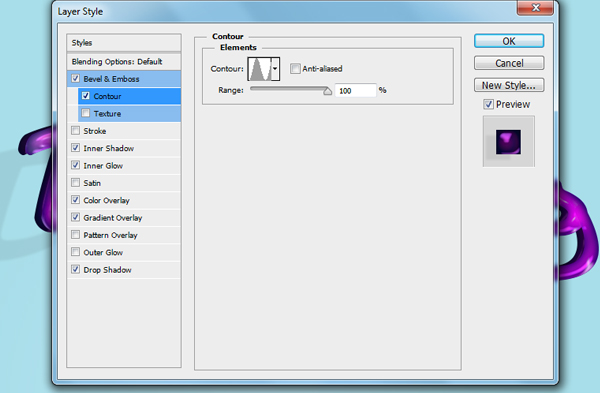
Contour
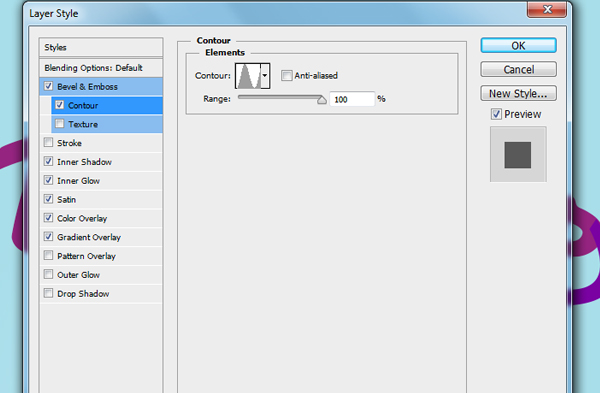
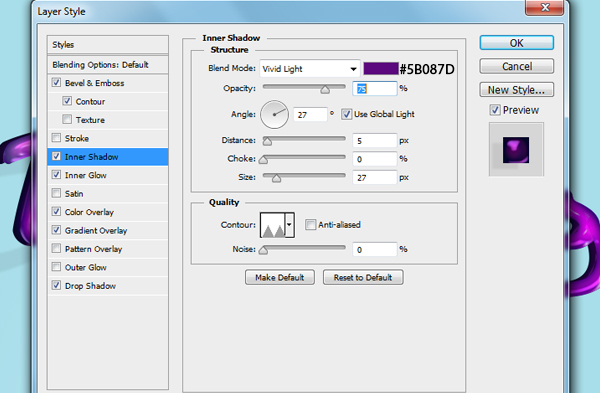
Step 8
Inner Shadow
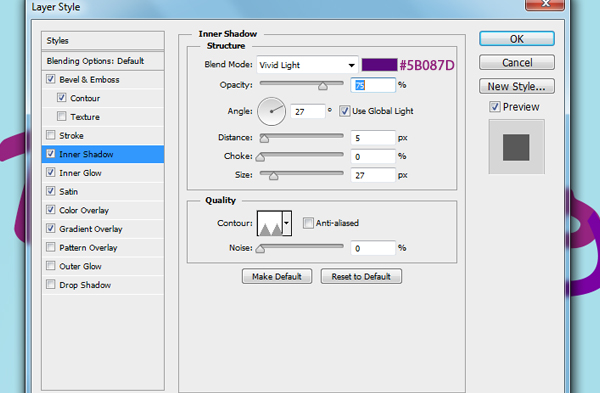
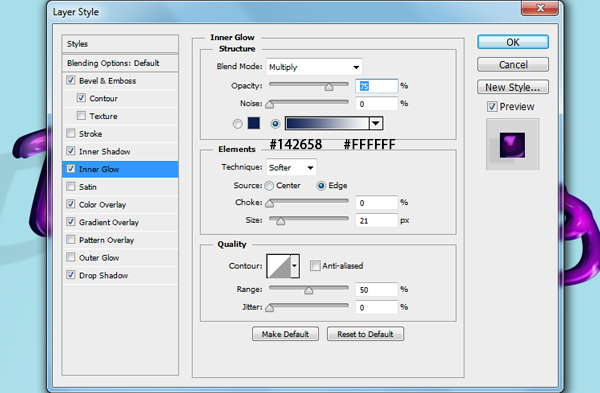
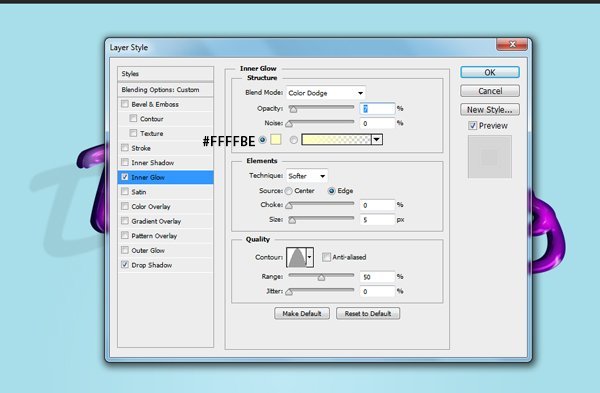
Step 9
Inner Glow
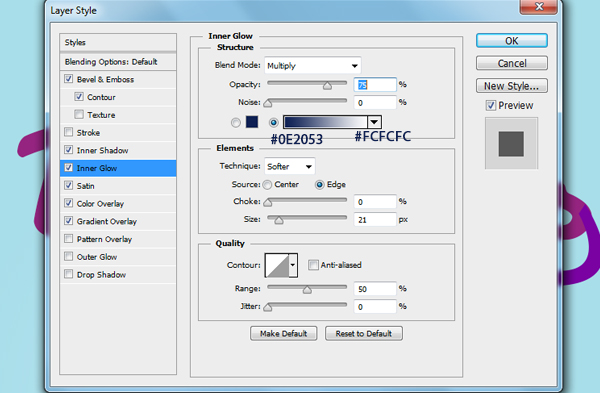
Step 10
Satin
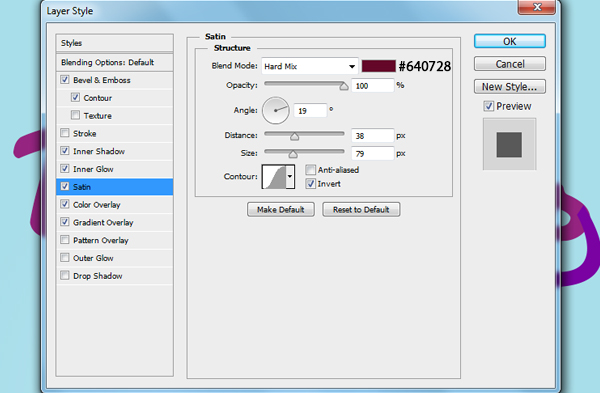
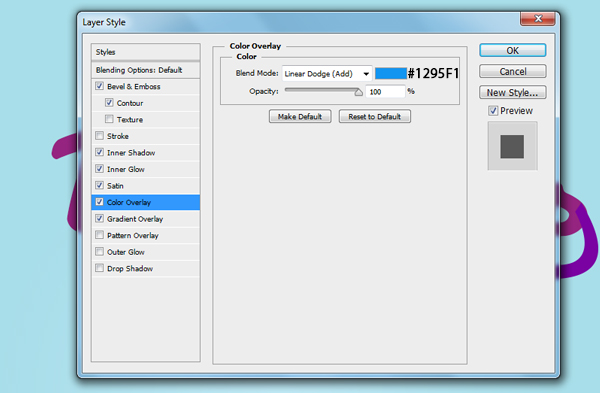
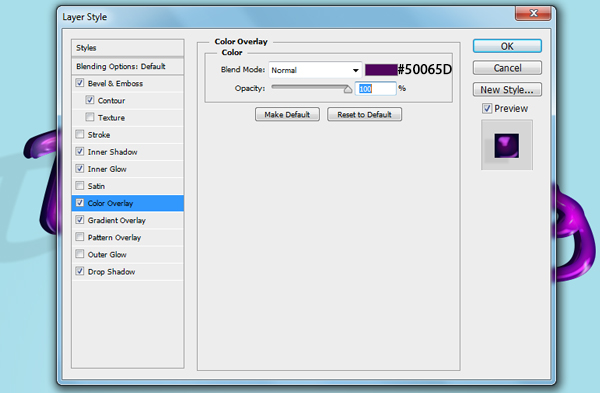
Step 11
Color Overlay
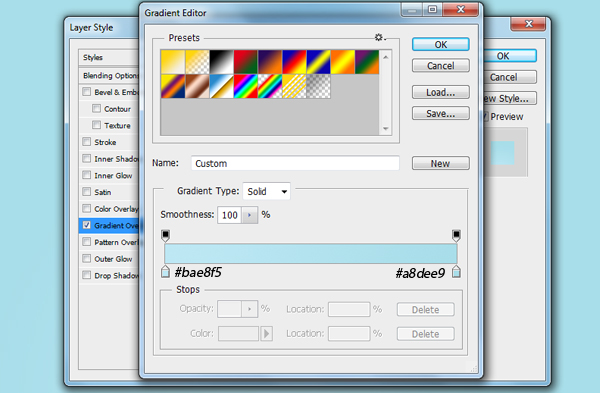
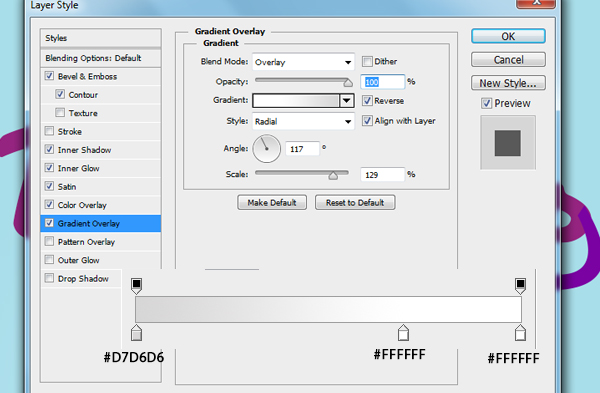
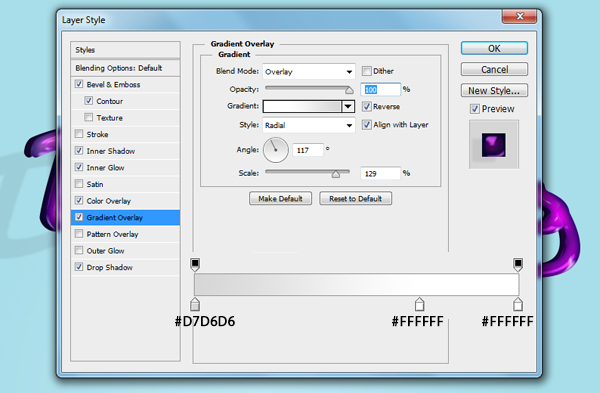
Step 12
Gradient Overlay
Step 13
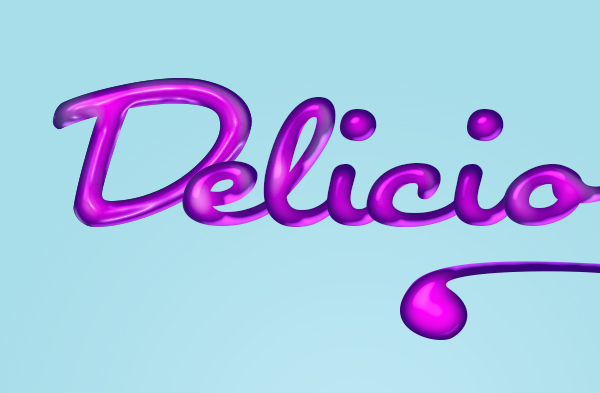
This is how your letter should look so far.

Step 14
Now while your “D” letter is still selected, right-click this layer and select “copy layer style.” Now go to all your other letter layers and paste this layer style onto each layer


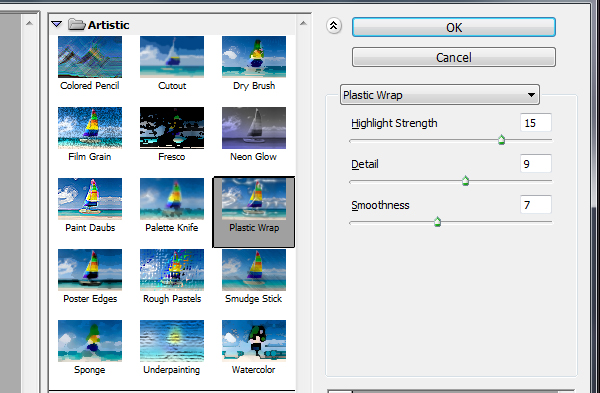
Step 15
Now go back the your “D” layer and duplicate it by right-clicking “duplicate layer” or by dragging it to the “create a new layer button.” Once you’ve done that convert the layer to a smart object by right-clicking and rasterize it. Now go to your Filter Gallery, Filter>Filter Gallery. And apply these settings:
Step 16
Change this layer to Luminosity, and play around with the opacity. This is how it should look. Do this to the remaining layers

Step 17
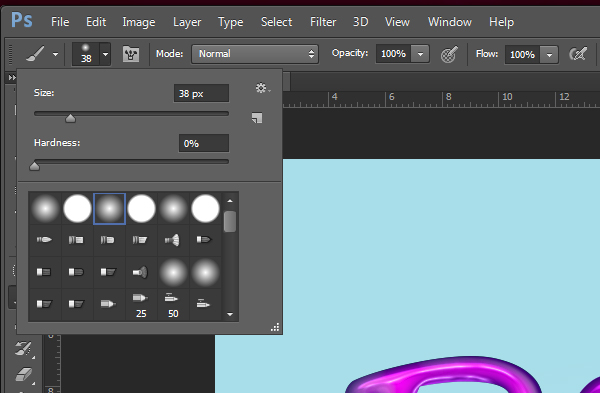
Now go back to your “D” layer and create a new layer and select a soft round brush
Step 18
Using this color #49043c add shadows beneath the overlapping layers.
Step 19
Change this layer to Linear Burn

Step 20
Repeat these steps for the rest of the layers

Step 21
The image still looks a bit flat so lets change that up a bit. Starting with the letter “D” go to each letter and make a selection of it by pressing ctrl + alt at the same time like the image below.

Step 22
Create a new layer beneath the “D” layer and fill it with #49043c. Move this layer to the left a bit.

Step 23
Add these layer styles starting with Bevel and Emboss.
Step 24
Contour
Step 25
Inner Shadow
Step 26
Inner Glow
Step 27
Color Overlay
Step 28
Gradient Overlay
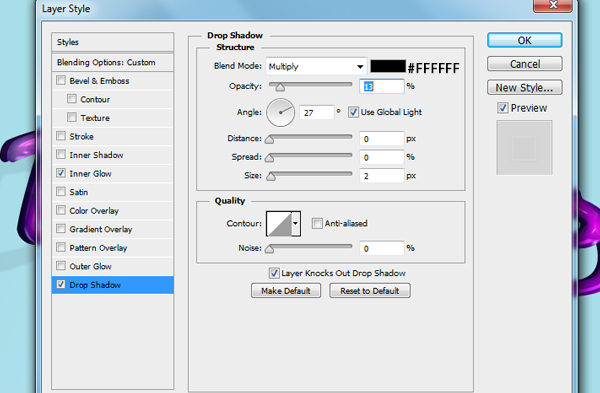
Step 29
Drop Shadow
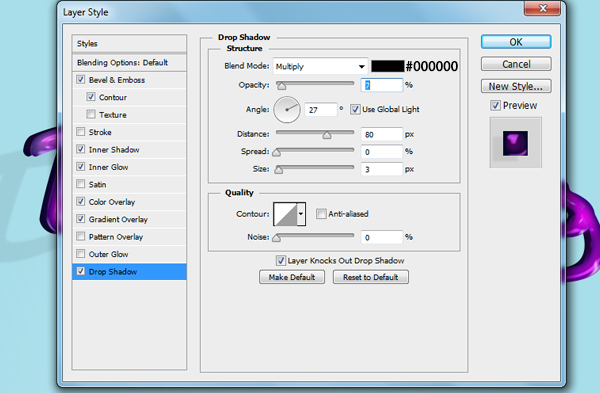
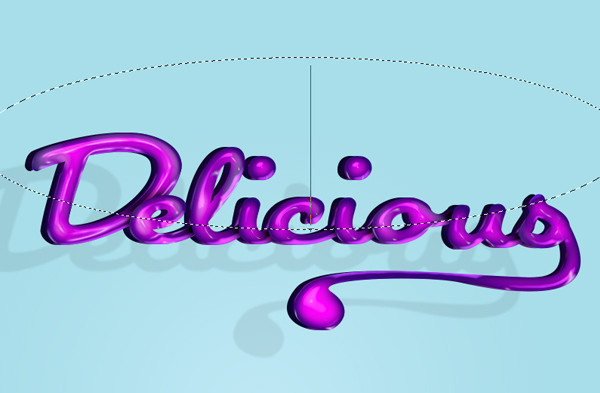
Step 30
Now create a new layer, this layer should be your top layer. And with an elliptical tool make a oval over half the word.

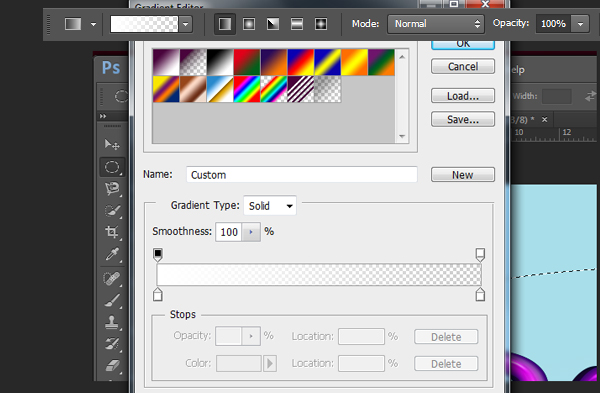
Step 31
With the gradient tool selected, create a white to transparent gradient.
Step 32
Draw a line from the bottom to the top of the word
Step 33
Now with this layer still highlighted, make a selection of the letter layers including the layer we created with the Drop Shadow

Step 34
Now Select>Inverse and press delete to get rid of the outer edges.
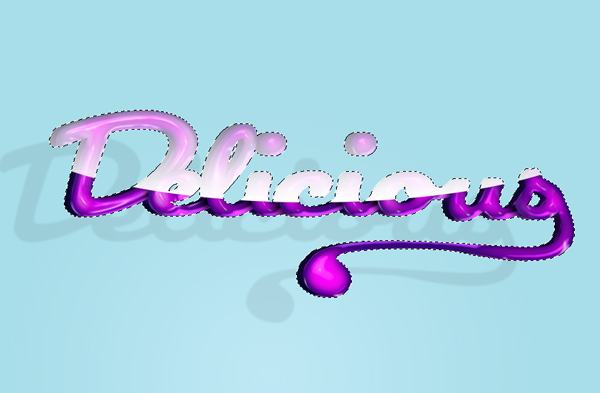
Step 35
Change this layer to Soft Light with an opacity of 43%. And add these layer styles.
Step 36
Drop Shadow
Step 37
This is how it should look

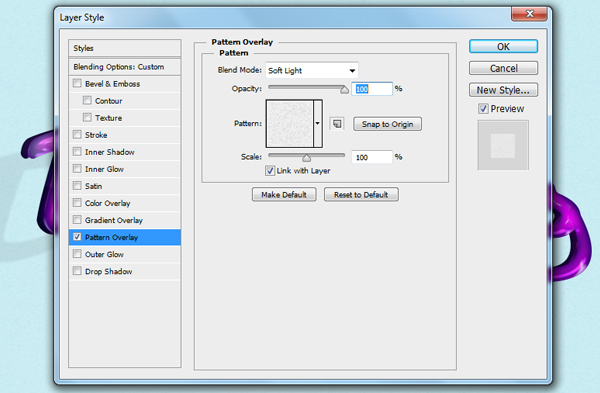
Step 38
Now create a new layer above your background gradient layer. Fill it with any color and apply this pattern overlay. Note: make sure the Fill is at 0%. Since I’m working with Photoshop CS6 this pattern came with this version of Photoshop.
Step 39
Lastly I will add stripes to the background. Create a new layer in between the pattern overlay and background gradient layer. Choose the rectangular marquee tool and make strips along your document. Fill it with the color #ba9a75

Step 40
Change this layer to Color Burn with an opacity of 50% after you rotate your stripes to the right a bit.
Step 41
Take this layer and put it in a folder, then change this layer to Hard Mix with an opacity of 21%. And you’re done!


Loading…